-
Lemon Curd
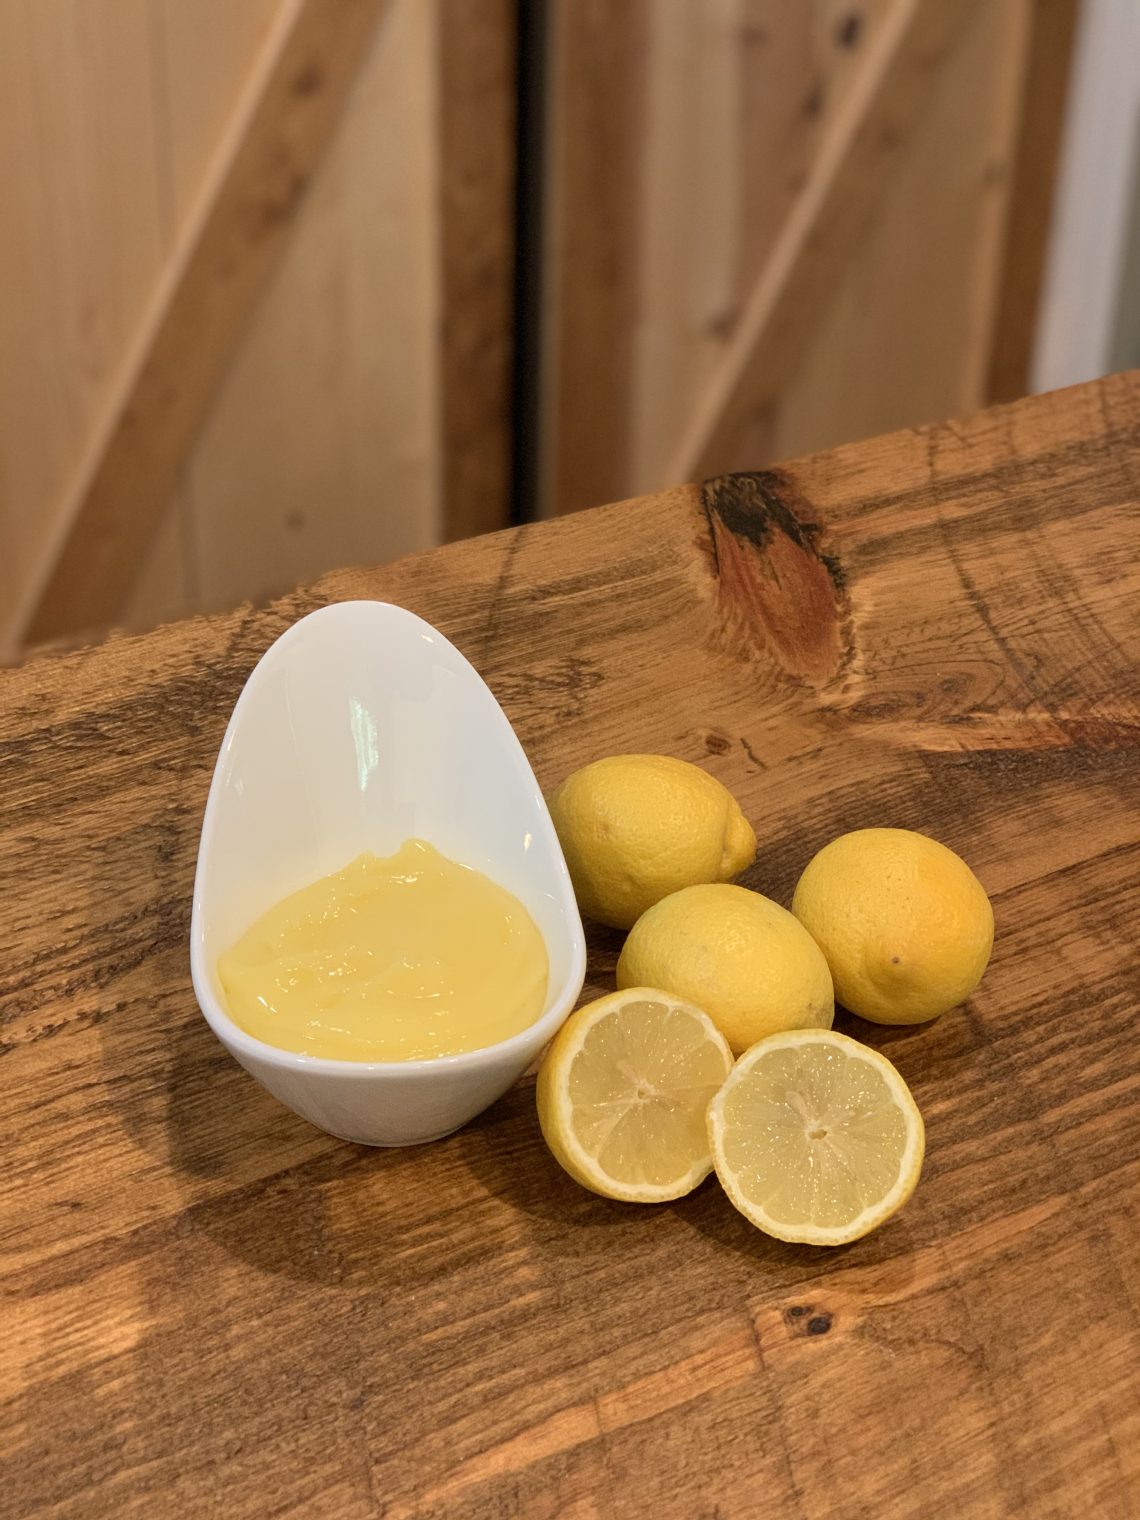
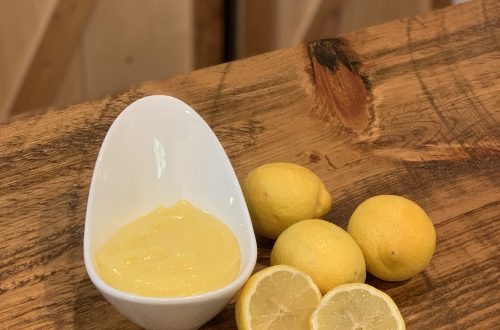
Lemon curd, when made right, taste like sunshine. And after making your own you won’t want to buy it from a jar ever again. It’s bright, smooth, and silky. It doesn’t apologize for the butter and egg that is used to make it. Because that is what gives it such a velvety texture. It’s tart and sweet and so versatile.
I feel like Bubba from Forest Gump when I start naming all of the uses for this but possibilities are pretty endless. First just eat it like it is or spread it on your croissant, hearty whole grain bread, waffle or pancake for breakfast. Grab your favorite short bread cookie or merengue and get dipping. Top a slice of pound cake and add berries for a beautiful dessert. Fill puff pastry and make a turnover. Grab a tart shell and fill or top your favorite cheese cake with it… are you getting some good ideas? Because as I’m writing this I keep thinking up more ways.
If those weren’t enough for you, make your favorite cake and use this as a filling. It somehow defies all logic to think that something that starts with butter and eggs can not feel so heavy. It brightens up whatever you decide to add it too. I actually made a white cake, 3 layers and added this as one of the filling layers and used raspberry preserves for the other. The combination is classic and so summery. I frosted the cake with cream cheese frosting.
Don’t be afraid to make your own and come up with different ways to eat it. It’s so worth it. Enjoy!
Lemon Curd
Ingredients
- 1 stick unsalted butter softened
- 1 1/2 cup granulated sugar
- 4 lg whole eggs
- 1 lg egg yolk
- 1/4 cup lemon zest
- 1/2 cup lemon juice
- pinch salt
Instructions
- Whisk sugar, butter and lemon zest
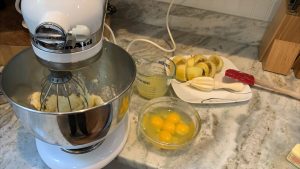
- Add whole eggs and egg yolk whisk to combine then mix in lemon juice and pinch of salt. Now don't freak out…it will look awful at this point. But it gets better. Trust me.
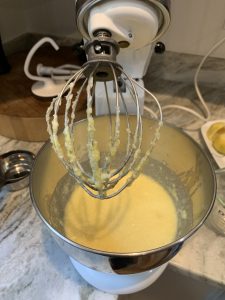
- Add mixture to sauce pan and over low heat begin to cook stirring constantly.
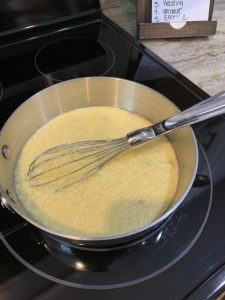
- Its starts to look pretty good, as you can see I don't worry about the lemon seeds we are going to strain them out later.
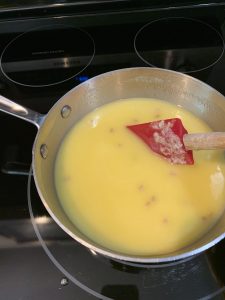
- Cook until it starts to thicken, do not let it boil. Check for nappe, it will coat the back of a spoon and when you make a stripe it will stay there.
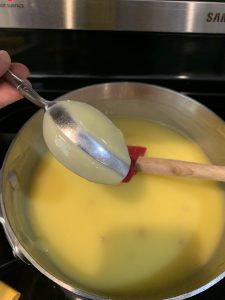
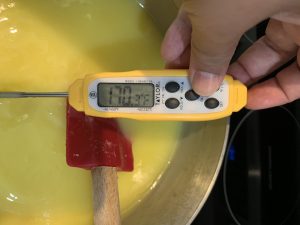
- If you want another way to test for doneness you can use your thermometer, you are looking for a temperature of 170 degrees
- Strain. Capturing any lemon seeds, or yucky egg bits.
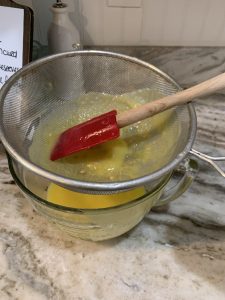
- Place over an ice bath to cool, then place plastic wrap directly on top of the curd and place in the fridge to continue cooling for at least 2-3 hours.

Notes
Now how do I use lemon curd in my kitchen…besides slathering it on everything? I love to fill cakes and pastries with it. Tarts, cakes, donuts, turnovers, cheese cake topper… Its amazing on croissants, on a nice piece of pound cake. Can you tell that I like lemon curd. by the way, I make other “curds” pretty much the same way. Lime, passion fruit, grapefruit… Have fun with it! Enjoy!

-
How I drop a good beet.
Excuse the sad pun, I couldn’t help myself!
Beets are one of those things that people either love them or hate them. To be honest I thought I hated them for a long time. It wasn’t something that was in my diet growing up and the only time I actually saw beets were in a salad bar in a murky strange liquid. Not the most appetizing thing in the world. But I’ve always prided myself on trying new things, even things I thought I didn’t like. I have a rule about it too, don’t just try something one way. If you don’t like something, it just might be how it has been prepared.
My love affair with beets began about 15 years ago. And not only are they yummy and earthy and sweet, but they are sooo good for you, which is a bonus. They contain, antioxidants, protein, fiber, vitamin c, folate, vitamin b6, iron and so many other good things. So many things that a person like me living with fibromyalgia needs. Any little help I can get.
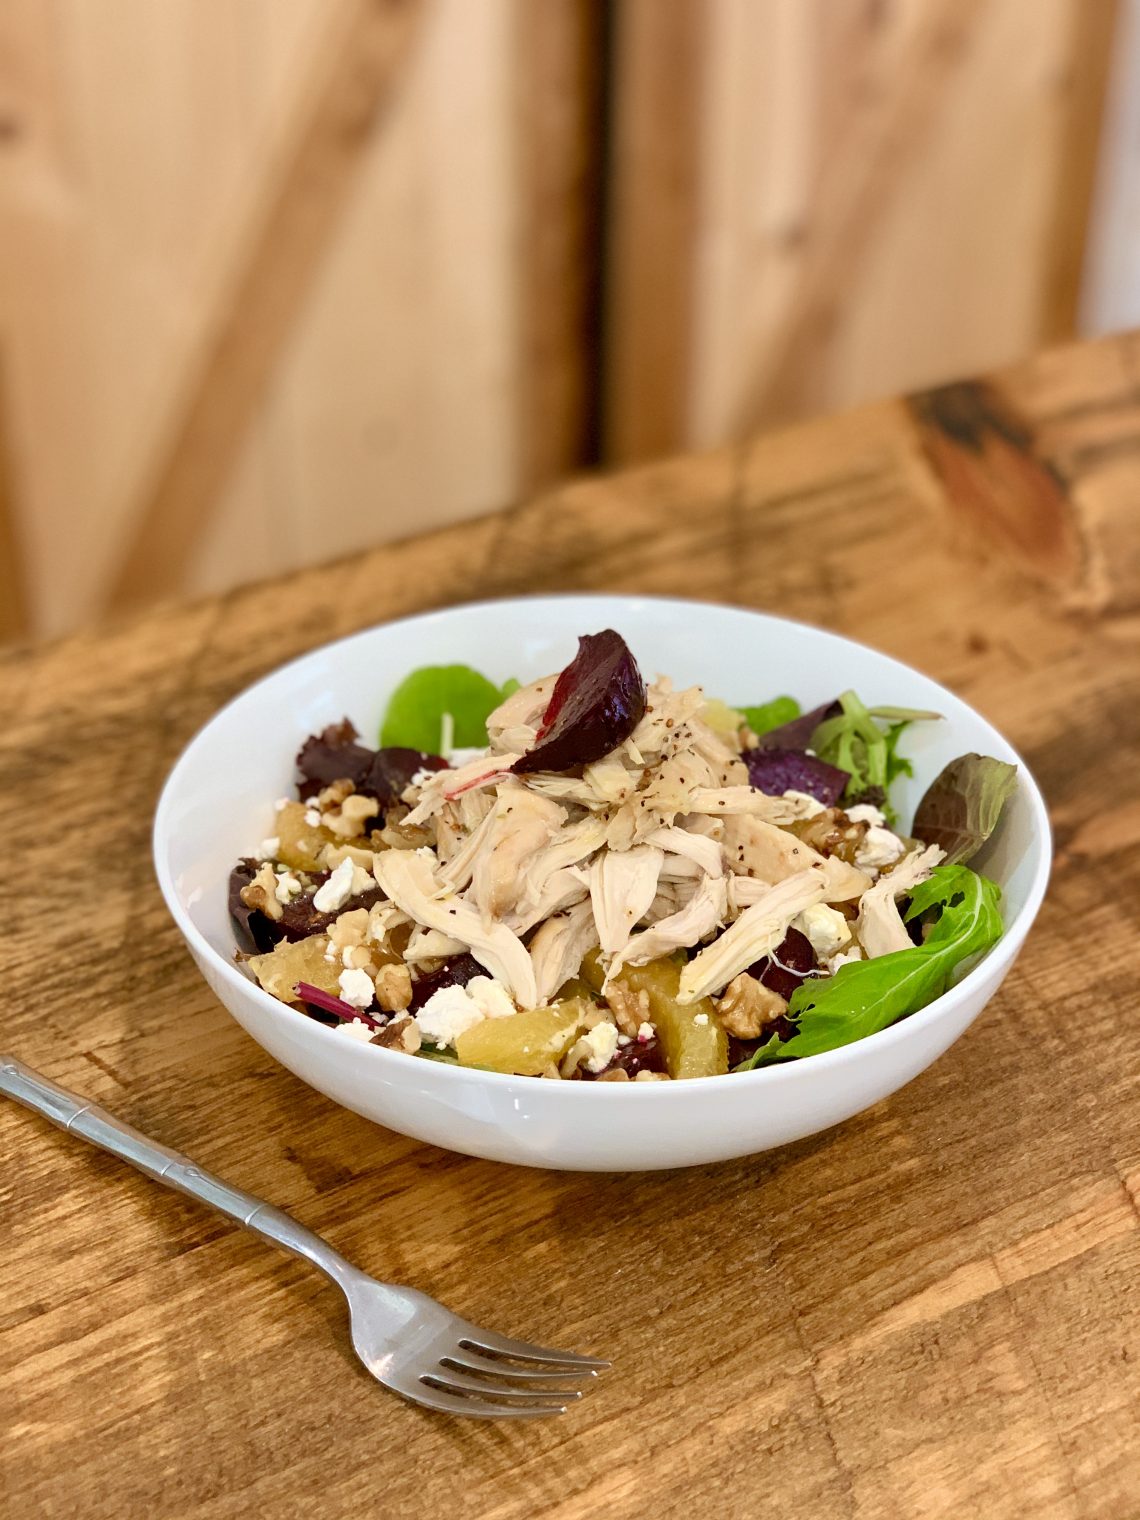
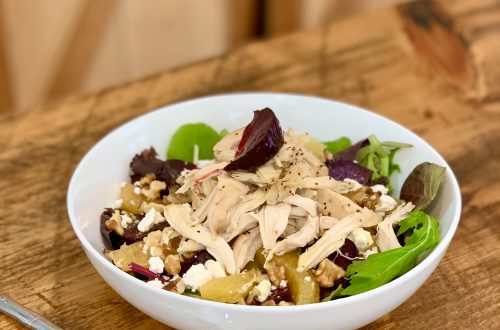
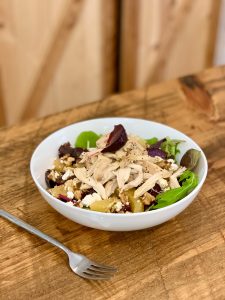
Now as good as beets are steamed with butter, or shredded raw in slaw, or as chips, or even ground and added to brownies (yea I said it, hide those bad boys in your desserts). My favorite way to eat beets hands down is in this super simple salad. The earthy sweetness is such a great contrast to the tart creaminess of goat cheese. Then you add the sweet acidity of the orange segments, nutty crunch of the walnuts and top with savory shredded chicken. The only thing that can make this better is my super simple vinaigrette.
I can eat this all the time. Unfortunately while I am a LOVE beets person, my family falls on the other side… where did I go wrong? I hope that someday they will see these beautiful little jewel colored tuberous roots as the amazing eats that they are. Until then, I guess I will have to eat them all!
Enjoy!

Beet and goat cheese salad
Roasted beets, shredded chicken, orange segments, goat cheese and walnuts drizzled in a simple vinaigretteServings 4Ingredients
Salad
- 12 cups mixed greens
- shredded chicken see ingredient group
- 4 small roasted beets see ingredient group
- 2 navel oranges segmented, juice squeezed and set aside for vinaigrette
- 4 oz chevre
- 1/4 cup walnuts
- 2/3 cup vinaigrette see ingredient group
Roasted beets
- 4 beets small/medium
- 1/4 cup olive oil
- 2 tsp kosher salt
Baked chicken breast
- 2 boneless skinless chicken breast
- 2 tbsp olive oil
- Kosher salt to taste
- Black pepper to taste
- garlic powder to taste
Vinaigrette
- Orange juice squeezed from oranges that you have segmented
- white balsamic vinegar enough added to the orange juice to make 1/3 cup
- 1 tsp dijon mustard
- 1 tsp honey
- 1/3 cup olive oil
- 1/4 tsp dry basil
- 1/8 tsp garlic powder
- Kosher salt to taste
- Black pepper to taste
Instructions
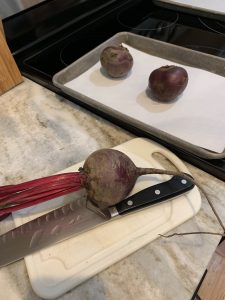
- After cleaning and drying your beets, cut top and bottoms off.
- Drizzle with olive oil and season with kosher salt
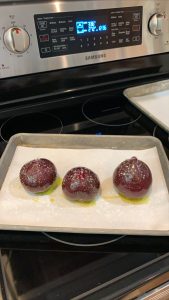
- Roast at 375 degrees until a pairing knife can easily be inserted, 45min to 1 hr
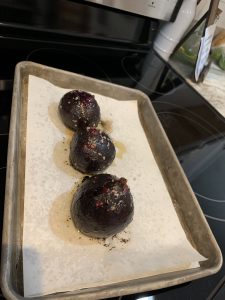
- Peel and set aside
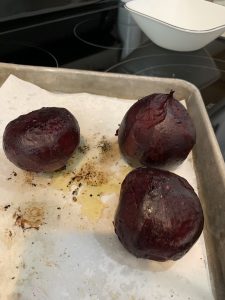
- Bake chicken breast. Place on a sheet tray, drizzle with olive oil and season with salt, pepper and garlic. Bake for about 30 minutes until a thermometer reads at least 165 degrees.
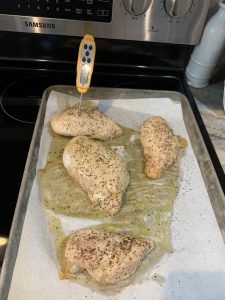
- Let cool slightly and shred
- Peel and segment orange

- Squeeze segmented orange into a small bowl or measuring cup. Add white balsamic vinegar to reach 1/3 cup of liquid.
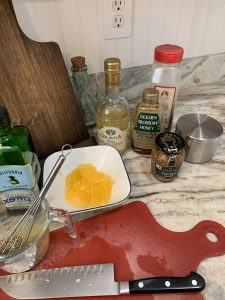
- Add mustard, honey, seasoning and then whisk in olive oil.
- Time to put it all together, you can toss the salad all together or compose it.
-
“Ring ding” inspired cakes
Isn’t it crazy how things come about? My husband and I were watching Transformers, a movie we have seen a million times before, and there is a part where the president asks one of his staff members on the plane to “rustle him up some ring dings”. Well that turned into a whole debate about what snack cake was the best, and how much they have changed, how much smaller they are and how they no longer taste as good as they used to.
I knew what was coming next….
My husband turns to me and asks “can you make me some ring dings?” How could I say no? Admittedly I should have said maybe another time… as I started these at 8:30 at night, but I have made this chocolate sheet cake so many times that I can do it in my sleep. And as it turns out all of the ingredients were already in my pantry.
Now my problem is that he is making a mental list of all of the other snack cakes he used to love that he wants me to recreate. Once again I have created a monster. LOL!

Home made “ring dings”
A home version of a childhood treatIngredients
- 2 sticks unsalted butter
- 1 cup coffee
- 3/4 cup cocoa powder
- 2 cups granulated sugar
- 3/4 cup sour cream
- 2 lg eggs
- 1 tbsp vanilla extract
- 2 cups AP flour
- 1 tsp baking soda
- 1/2 tsp salt
marshmallow butter cream
- 1 1/2 sticks unstalted butter softened
- 2 cups powdered sugar
- pinch salt
- 1 tsp vanilla extract
- 1 tsp heavy cream
- 2 cups marshmallow fluff
chocolate ganache
- 2 cups semi sweet chocolate chips 1 package
- 3/4 cup heavy cream
Instructions
- Prepare your pan, spray with pan spray and lay a sheet of parchment on it. In a small bowl combine sour cream, eggs and vanilla. In another bowl combine flour, baking soda and salt. Set aside. Pre-heat oven to 350 degrees.
- in a medium pot over medium heat add butter, cocoa, sugar and coffee
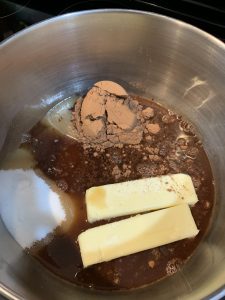
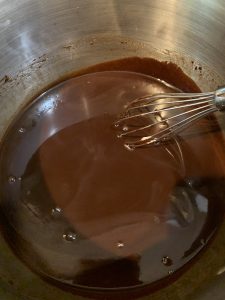
- Whisk until melted and it just begins to bubble then take it off the heat
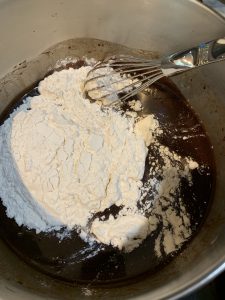
- dump in the flour, baking soda and salt and begin whisking
- Then add sour cream, egg and vanilla mixture and whisk to combine it all
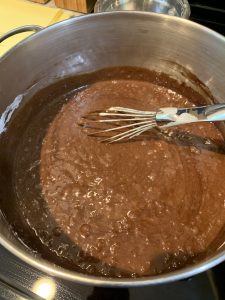
- Pour into prepared pan and even out as best you can and place in the oven.
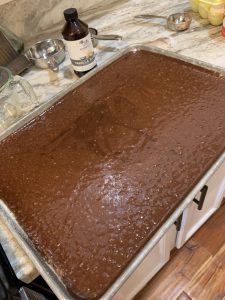
- It takes about 12-14 minutes and I rotate the pan half way to prevent one side from being higher. Let cool.
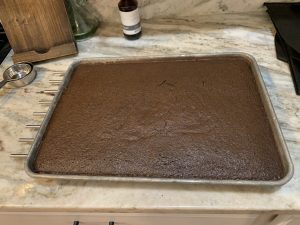
Marshmallow Frosting
- While the cake is cooking make your frosting. Whip your softened butter until it lightens, about 2 minutes, scraping down the bowl occasionally. Then add powdered sugar and a pinch of salt. Mix to combine. Then add vanilla and heavy cream and whisk until fluffy 2-3 minutes. Add 2 cups of fluff and whip just to combine.
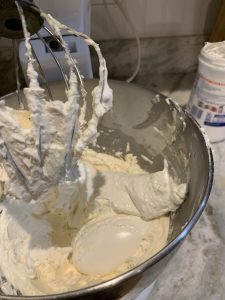
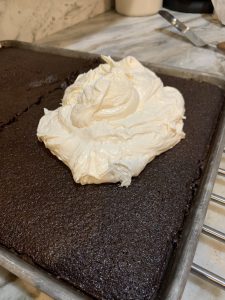
- Cut cake in half and add frosting on half of the cake and spread.
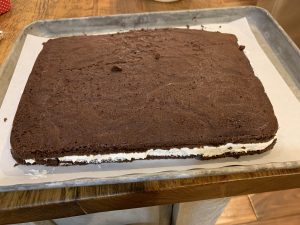
- Then flip the other half onto the frosted side. Freeze for 15 minutes to set up.
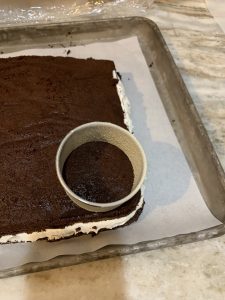
- After cake starts to set up, its time to cut. I used rounds, which does leave a lot of scraps that the people in my house were more than happy to take off my hands, but you can easily cut into squares.
- once again after you have cut out your rounds (or squares) return to the freezer to set up another 15-20 minutes.
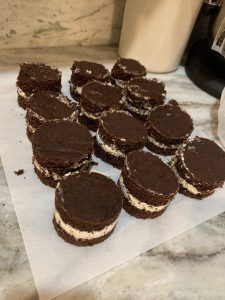
ganache
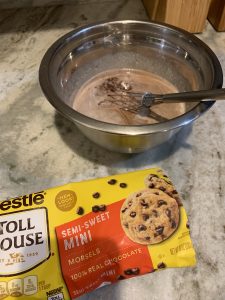
- Take your package of chocolate chips, I used nestle this time because that is all I had in the pantry. Place into a bowl. Heat heavy cream until just scalded (bubbles start to form on the edges but its not to a boil). Dump the cream over the chocolate and let it sit for a minute. Then whisk it smooth. It will be thick almost a pudding consistency.
- Time to glaze up the cakes. Remove the cakes from the freezer and place about 2 tsp of ganache on the top. Smooth it out and using an off set spatula or spread ganache on the sides.
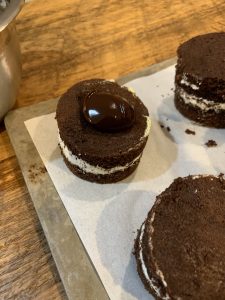
- Add sprinkles and place in the refridgerator to set up. ( I placed it in the freezer so I can let it set up quicker in order to cover with plastic wrap for the net day)

Notes
You can use milk chocolate or even white chocolate if you prefer. Both would be yummy! I use this chocolate sheet cake recipe for a lot of things, its rich and dense and works well with layering. I’ve been known to keep one made in my freezer for quick dessert…. -
Tropical bananas foster
When I think of bananas foster, I think of… no not New Orleans… I think of friends, gatherings, perfect endings to perfect days. Lobster boils and smells of the ocean, laughter and tall tales, kids running around way past their bedtimes and the promise of another amazing day ahead. I have so many memories associated with this rich, sweet, boozy dessert that is both warm and cool, smooth and full of texture at the same time, that it just wouldn’t be summer without it.
So of course I couldn’t let the Fourth of July pass without sharing this dessert that is a go-to of mine during the summer. It never gets old, and it can be as elegant as you want to make it or casual for a week night treat.
Now that you have this little recipe… play with it. Change the fruit, I’ve done this with apples and brandy and served it over ice cream with nutty granola. Or peaches and grand marnier with crumble topping. I can go on. I hope you add this to your summer entertaining. Enjoy!

Tropical Bananas Foster
A tropical twist on a classic new orleans dessert.Servings 4Ingredients
- 1 cup shredded coconut
- 1/2 gallon vanilla ice cream
- 4 tbsp unsalted butter
- 1/2 cup brown sugar
- 1/2 tsp cinnamon
- pinch of kosher salt
- 2 bananas
- 1/4 pineapple peeled, cored, sliced
- 1/4 cup dark rum I used Bumbu but you can use: bacardi, meyers, captain morgan… (you can also sub with orange juice if you don't want to use alcohol)
Instructions
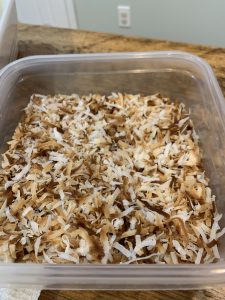
- Pre heat oven to 350 degrees. Spread the shredded coconut on a small sheet tray and place it in the oven and cook for 5-10 minutes. Check after 5 and move around to evenly brown. (don't forget its in there…I've done it LOL) Cool and set aside. I usually do this a day ahead.
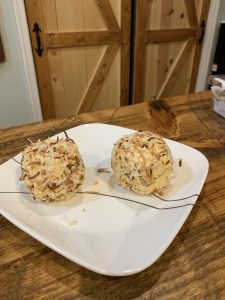
- This is totally optional but looks great. Scoop out about a cup of ice cream and shape into a ball.
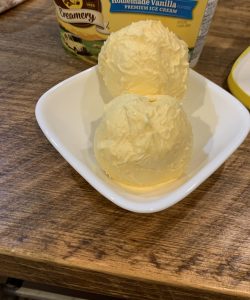
- Roll ice cream into toasted coconut and place into the freezer to firm up.
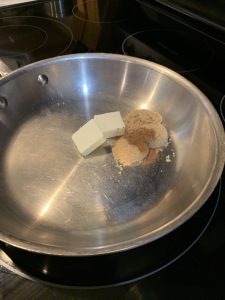
- (I am showing picture on 1/2 of the recipe so you can see it better) Place your butter, sugar, cinnamon in a skillet and place over medium heat.
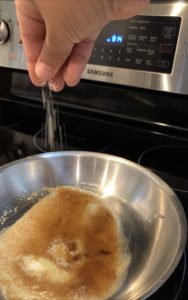
- Once the butter and sugar start to melt sprinkle in a pinch of salt.
- Add your bananas and pineapple, cook for about 2 minutes and then flip
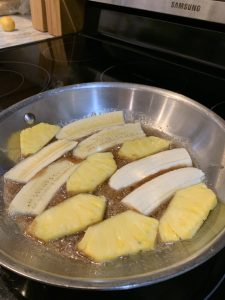
- once flipped get ready to add your rum
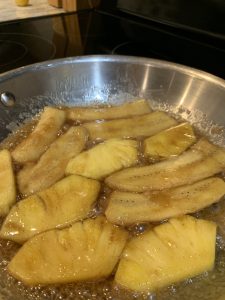
- I used Bumbu, because that is what we had. But a dark bacardi, meyers, captain morgan or whatever your favorite dark rum is fine. You can also sub with pineapple juice or orange juice if you do not want to use alcohol

- Add you rum. Off the heat if you have a gas stove. Then flame. I did this inside (not recommended be careful) and used a lighter. I usually do it outside at night and my guests always get a kick out of it. Cook until the flames die out and serve.

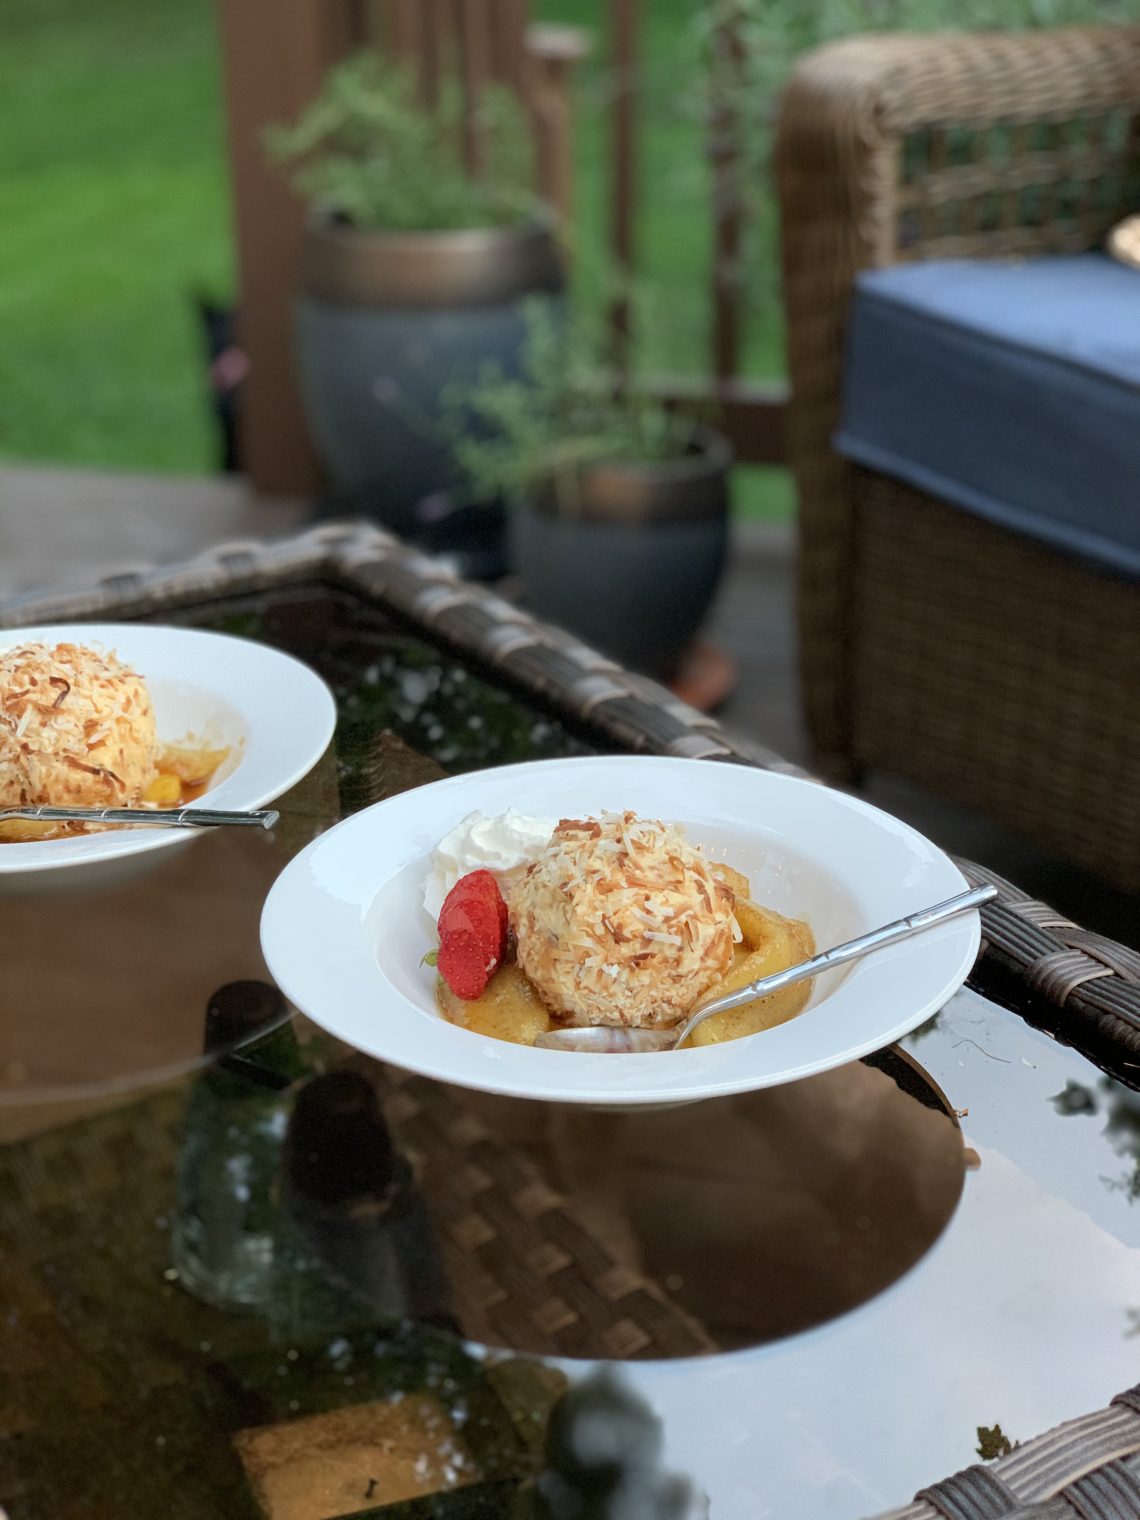
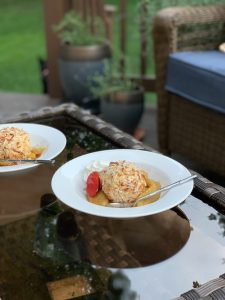
- Time to plate it up. I like to place the fruit at the bottom and plop the ice cream on top with a little bit of whipped cream and mint, or a strawberry for extra color. And of course… I love to eat it outside.
-
Skillet Mac, the ultimate comfort food.
I don’t know about all of you, but these past couple of months have been rough. There are good days. The ones that you wake up feeling optimistic and think about all the things you now have the time to do. And there are bad days. The ones where you want to just stay in bed until this is all over. We are all missing family, work, friends, the ability to go to a Starbucks and pick up a cappuccino with a couple of squirts of cinnamon dolce and wander the mall aimlessly buying items that you don’t even need. Well maybe that last one was just me…
It’s hard to live in limbo. This situation we are all in has really put a spot light on how much we all need our “people”, our friends, family, co-workers, our friendly waitress, our favorite barista, the friendly faces that we count on to help us through the hard times. I wish I can say this is all going to be over tomorrow. Or when you wake up this will all have been a bad dream. The only thing I can offer you is a little comfort in the form of an old friend.
Here is my skillet mac and cheese recipe. I hope it brings you a smile, as making it for you these past years brought me.

Skillet Mac and Cheese
The easiest mac and cheese ever! This is the base to all of the skillet macs we had at the cafe.Servings 4Ingredients
- 1/2 pound cavatapi pasta cooked
- 2 cups heavy cream
- 1 1/2 cups shredded cheddar cheese
- 6 slices american cheese
- everyday seasoning to taste** a mix of kosher salt, pepper and granualated garlic.
Instructions
- Boil half a box of cavatapi pasta per box instructions. Gather you ingredients.
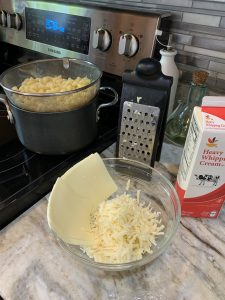
- In a large skillet, on medium heat pour in heavy cream. Add your cheeses and a good pinch of everyday season.
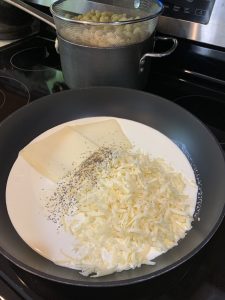
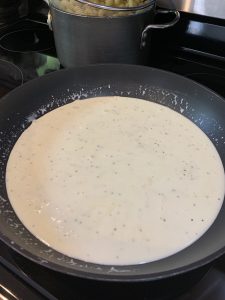
- Melt the cheese into the cream
- Add the cooked cavatapi
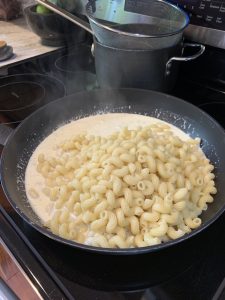
- Stir and let it get all bubbly. About 3-4 minutes
- And thats it!

Notes
I always have a mix of what I like to call “everyday seasoning” 1 cup kosher salt, 1/2 cup black pepper, 1/2 cup granulated garlic. Keep in a covered container I use it on meats, French fries, in my mac and cheese… For a gluten free version : use gluten free pasta. Instead of heavy cream use half and half and thicken it with a slurry. 2 cups of half and half, add your cheeses and everyday seasoning, melt the cheese (it will be a little runny) then in a small bowl mix another 1/4 cup of half in half with a couple of teaspoons of corn starch. Add to cheese sauce it will thicken and then add pasta. The Buffalo chicken Mac: Add a pounded breaded chicken breast fried crispy, slice top with buffalo sauce and a sprinkle of gorgonzola cheese. The Pulled pork Mac: Add bbq pulled pork and a topping of buttered panko. The Philly Mac: on a griddle or large skillet cook up thinly sliced rib eye (sometimes you can find this in the meat section, if not ask your butcher to slice some up. We did it in house at the cafe), peppers and onions, everyday seasoning. Top it with buttered panko. The JR Mac: Add pickled jalapeños and chopped cooked bacon to the Mac and cheese. Top with a pounded breaded chicken breast fried crispy. Drizzle with bbq sauce. The Mexi Mac: switch out cheddar for pepper jack, add a little more peppers to the Mac. Top with grilled seasoned chicken breast and tri colored tortilla strips The Kendell Mac: add chopped bacon and baby spinach (fresh) to your Mac. Top with pounded breaded chicken breast fried crispy. Drizzle with ranch. The Cordon blue Mac: Add chopped ham and a spoonful of dijon mustard to the Mac. Top with a pounded breaded chicken breast fried crispy. Drizzle with honey mustard. -
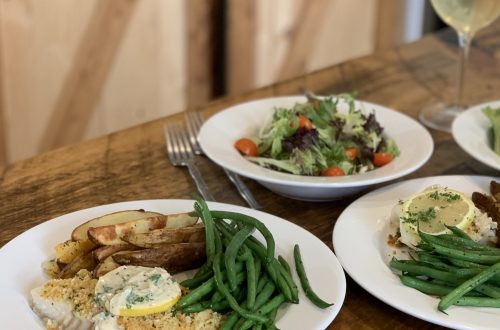
Baked cod with Beurre Blanc
Don’t let the name fool you, beurre blanc is just a white wine sauce. It’s not as scary as you think and once you make it you will wonder why you haven’t been making it all along. This is also a great excuse to open a bottle of wine, not that you need any.
Now I love seafood! I can eat it daily. My hubby on the other hand, had to be slowly introduced to seafood. Not that you would know it now, lol. One of the easiest ways to get someone to eat fish is by starting them off with something mild like cod. Give it a little crunch, add an awesome sauce and you will have create a monster like I did.
Bonus is that this is such a quick dish you can make it anytime, but it is elegant enough for a sweet date night.
Enjoy!

Baked Cod with Beurre blanc
Panko crusted cod with white wine butter sauceIngredients
Baked Cod
- 1 1/2 pound Cod
- salt and pepper to taste
- 1 cup panko
- 1/4 cup melted unsalted butter
- 1 tbsp old bay
- 1 tsp lemon zest
- 2 tbsp chopped parsley
Beurre Blanc
- 1 cup white wine, I used sauvingon blanc today pinot grigio, chardonnay ok too
- 2 tbsp fresh squeezed lemon juice
- 2 tbsp shallot
- 1/2 tsp cracked black pepper
- 6-8 tbsp cold unsalted butter
- 2 tbsp heavy cream
- 1 tbsp chopped parsley chives works nice too!
- salt to taste
Instructions
- Pre-heat oven to 375 convection bake or 400 conventional. Clean and portion your cod, about 4-6 ounce pieces. Place on lined sheet tray and season with salt and pepper.
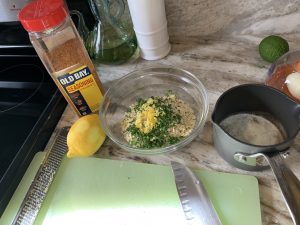
- In a bowl combine, panko, lemon zest, old bay, parsley and melted butter.
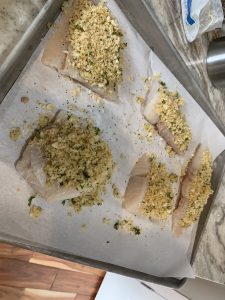
- Top Cod with bread crumb mixture and bake 15-20 minutes.
- While your fish is baking… In a medium saute pan over medium high heat add your wine, shallot, lemon juice and cracked black pepper and bring to a simmer.
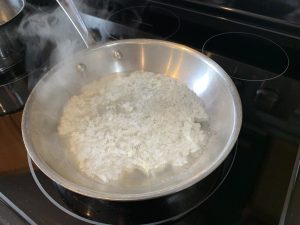
- Reduce by half, about 8-10 minutes
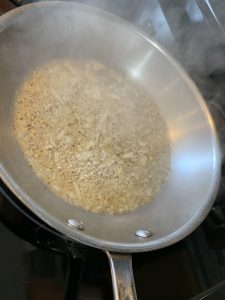
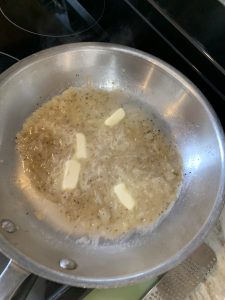
- Take off of the heat, and add cold butter while. You can whisk it in, but I like to swirl the pan to incorporate.
- Add heavy cream and a salt to taste.
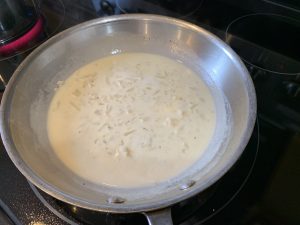
- you can strain the sauce, then add parsley or just add parlsey and serve over your fish.
- Remove your fish from the oven, making sure not to over cook.
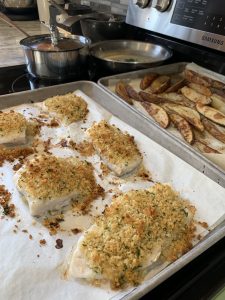
- Serve with rice, roasted veggies, potato wedges, a side salad…
-
Habichuelas Guisada (Puerto Rican Stewed beans)
I am sticking to the Comfort food theme today. I love how warm and cozy the house smells when these beans are cooking away. It’s not a quick cook item , it’s definitely one that will bubble away most of the afternoon and if there ever was a time to slow down and make a cozy meal now would be it.
I know some of you are wondering why I didn’t soak the beans, and say ham hocks aren’t traditional, and asking why I don’t have calabasa or potatoes in it. But this is just my family’s version and the one that I can get all 3 kids and a picky husband to not only eat but ask for again and again.
Traditionally this is served with rice and a protein. In my house I usually serve it with roasted chicken. But my favorite way to eat them…is with a fried dough or tostones. I added the recipe for a fried dough. If you haven’t tried it this way and love nice slow cooked, richly flavored beans like I do this is the way to go. YUM!
I hope you will give this a try. Enjoy!

Habichuelas Guisada
Our family's Puerto Rican Style beansIngredients
- 1 tbsp olive oil
- 2 ham hocks or smoked turkey necks or smoked wings
- 1 med yellow onion large dice
- 2 cloves garlic smashed but not chopped
- 1 pound pink beans picked through and rinsed
- water to cover at least 1 1/2 inch over beans (about 6 cups) you will be adding more as it is absorbed
- 2 bay leaves
- 1 can goya tomato sauce 8 ounce
- 1 packet sazon
- 2 tbsp olives
- 2 tbsp sofrito
- salt and pepper to taste
Instructions
- in a large enough pot over medium high heat, heat your olive oil and add onion, garlic and ham hock. Cook about 2 minutes, add rinsed beans, bay leaves and water.Bring to a boil. Cover and reduce heat to low.Cook for about 1 1/2 hours, then check. I usually add another 2 cups of water at this time. Cover and let it simmer on low for another hour. Check the beans for liquid, add more if needed (another cup). Let simmer for another 30 minutes.At this point, the beans should be tender but not overly soft.Add 1 can of tomato sauce, sazon packet, sofrito and olive.Let it cook partially covered for about 1/2 hour to thicken. Taste, add salt and pepper
Notes
Serve with white rice. I love to eat it a day later with tostones, sorullos and/or a simple fried dough.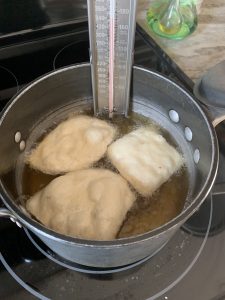
 2 cups water
3 tablespoons oil
1/4 tsp baking soda
1/4 tsp baking powder
1 tsp salt
and about 1/2 cup of water
Get your dry ingredients together, mix in oil and then slowly incorporate water until dough starts to come together.
Bring together and wrap in plastic wrap and let rest for 15 minutes
Roll out and fry in 350 degree oil.
Sprinkle with kosher salt
 -
Creamy chicken and rice soup
I am always up for a nice pot of home made soup and this was one of our top sellers we would sell out almost every time we had it at the cafe. This is also one of my family faves. It is also a great way to sneak in some healthy grains for picky eaters like my husband.
I almost hesitated putting this on the blog today, because as I sit writing this recipe up it is a beautiful 61 degrees with the sun shining and the breeze from the bay coming in, and I am fully enjoying the weather out on my front porch. But tomorrow is another day of rain and cooler temps and I think everyone can use a meal that feels like a warm hug right now.
So here is my social distanced hug to all of you! Enjoy!

Creamy Chicken and rice soup
Simple and easy, but so comforting.Servings 6Ingredients
Soup
- 4 tbsp unsalted butter you can use half butter and half olive oil
- 1 med white onion diced
- 2 stalks celery diced
- 2 med carrots diced
- 2 cloves garlic minced
- salt and pepper to taste
- 1 tsp dry thyme
- 1/4 cup flour
- 8 cups chicken stock broth, or water with boullion or base is ok too
- 1 pound roasted chicken breast shredded
- 2 cups cooked wild rice
- 1 cup half and half
- 2 tbsp chopped parsley
roasted chicken breast
- 1 pound chicken breast 2 medium sized
- 1 tbsp canola oil
- salt and pepper to taste
Wild Rice or other hearty grain
- 2 cups boiling water
- 1 cup wild rice mix (or any hearty grain mix)
Instructions
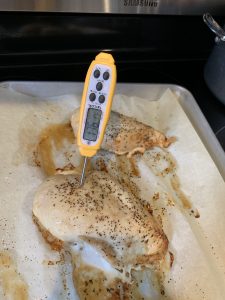
- Start with your chicken breast and wild rice or grain mix. Pre heat oven to 350 degrees.Place your chicken breast on a sheet tray, drizzle with oil and season with salt and pepper. Bake for 45 minutes until cooked through 165 degrees, set aside to cool and shred.
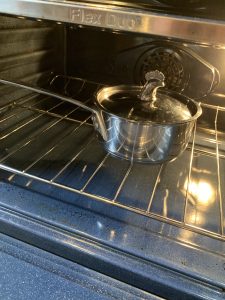
- Boil water in a small oven proof pot, add your wild rice or grain mix. Bring back to a boil and cover. Place into 350 degree oven for 45 minutes. Remove and set aside until needed for soup.
- In a large pot, over medium heat melt butter. Add your veggies, salt and pepper and thyme. Cook for about 4 minutes.
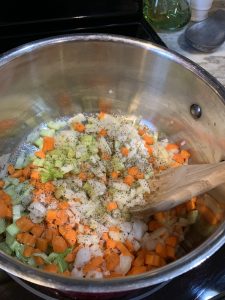
- Add flour, stir and cook for another 30 second
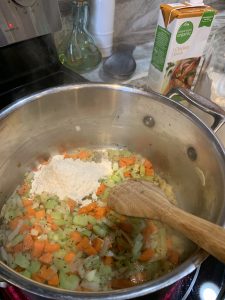
- slowly add in your chicken stock and stir well to ensure there are no lumps. Let simmer for about 5 minutes.

- Add shredded chicken and rice or grain mixture and let cook simmer for another 15 minutes or so.
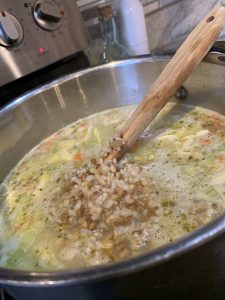
- At this point, check the soup for seasoning and desired thickness. Re season if necessary. Finish with half and half and parsley. **see recipe notes for gluten free option** If you would like your soup a little thicker mix in a tablespoon of corn starch to your half and half and stir that into the soup.

Notes
To make this gluten free, remove the flour. Make the soup and when you get to the part of re seasoning, you can mix a couple of table spoons of corn starch with your half and half. Bring soup back up to a boil and re asses your thickness then. You can always add a little more corn starch mixed with water or stock to the soup. I used a grain mixture this time, I like to make sure the grains I use are hearty and can stand up in the soup. I don’t like it when the grains absorb too much of the liquid.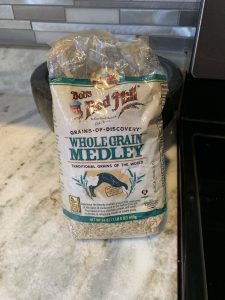
-
Basic Scone Recipe
I love a good biscuit…and what is a scone but a dressed up biscuit, am I right? I also love having a basic recipe that can accommodate all of the crazy combo ideas I have in my head while still coming out fluffy and delicious.
If any of you have ever been to the cafe and had one of our scones, this was the recipe I used. It’s ridiculously simple and a great blank canvas for you to get creative. Make them sweet or savory or try seasonal fruits and veggies. As I sit here, editing this post the ideas in my head for new scones are popping up. I hope you let your creativity free and make these delicious scones.
Enjoy!

basic scone recipe
Here is my basic scone recipe, I use it to make all different kind of variations. Both savory and sweet. Its a great jumping off point.Servings 8 sconesEquipment
- hand grater
Ingredients
- 3 cup AP Flour
- 1/3 cup granulated sugar
- 2 1/2 tsp baking powder
- 1/2 tsp baking soda
- 1 tsp kosher salt
- 12 tbsp unsalted butter 1 1/2 sticks (very cold)
- 1 cup buttermilk
- 2 tbsp heavy cream
Variations Cheddar Jalapeno
- 1 cup grated cheddar cheese
- 1/4 cup chopped pickled jalapeno
Variation
- 1 cup cinnamon chips
Variation Cranberry orange
- 1 cup craisins
- 1 tbsp orange zest
- 1 cup powdered sugar
- 1 tbsp orange juice
Variation Raspberry Almond
- 1 tsp almond extract
- 1 cup fresh raspberries
- 1/3 cup sliced almonds
- 1 cup powdered sugar
- 1 – 1 1/2 tbsp milk
- 1/2 tsp vanilla
Instructions
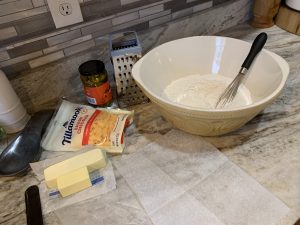
- Preheat your oven to 425 degrees or 400 degrees convection. Line a sheet tray with parchement paper, or spray with non stick spray.Mix all of your dry ingredients together in a large bowl
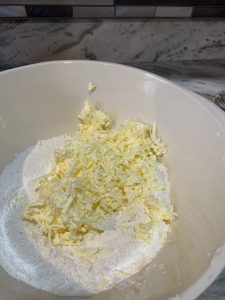
- Grate your cold butter and add it to your bowl
- Work the flour and butter together just until butter is small pea sized, then add your add ins ( in this case I added cheddar and jalapeno)
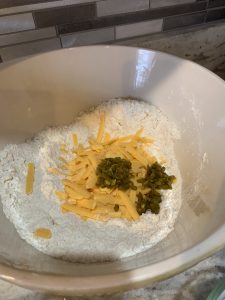
- Mix together with a fork, until evenly distributed. Make a well and add your buttermilk. Bring it together in the bowl with a fork until it starts to come together. If it looks too dry add a little more buttermilk a tablespoon at a time. ( I added 1 more tablespoon) then dump out onto your board (counter).
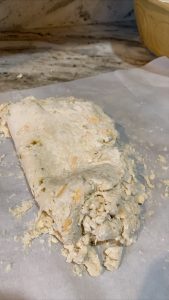
- I used parchement paper to fold over the ingredients. It keeps warm hands from melting the butter to much. Fold it over about 5 – 6 times and then shape into a cirlcle. Cut into 8 pieces. Place it on your lined sheet tray.
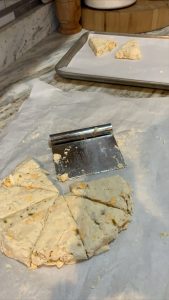
- Brush the tops with heavy cream and top with desired topping (I chose a jalapeno ring) (If I was doing a sweet scone I may top it with coarse sugar). A little bit of cheese would be nice as well.

- Bake for 18-22 minutes, I check it after 15 and rotate the sheet pan.

Notes
For the Cranberry Orange : add orange zest and craisins to the dry mixture before adding the buttermilk. While the scones are baking make the orange glaze with the powdered sugar and orange juice. Drizzle onto the warm scones. For the Raspberry almond: mix your almond extract in with your buttermilk and make the scone without any add ins. Once you dump your mixture onto your board, add the raspberries, incorporating them as you fold them in. Shape and cut as normal and after you brush with heavy cream sprinkle on your sliced almonds to the top. While the scones are baking make your vanilla glaze. Drizzle onto the warm scones. For the cheddar jalapeno: I often add a 1/2 cup of chopped cooked bacon to this. If I do I reduce the cheddar to 3/4 of a cup.
 -
Versatile picadillo recipe
I have a bunch of “basic” recipes that I use a for number of things. Here’s one at its simplest that can be added to and changed to adapt to however you want to use it.
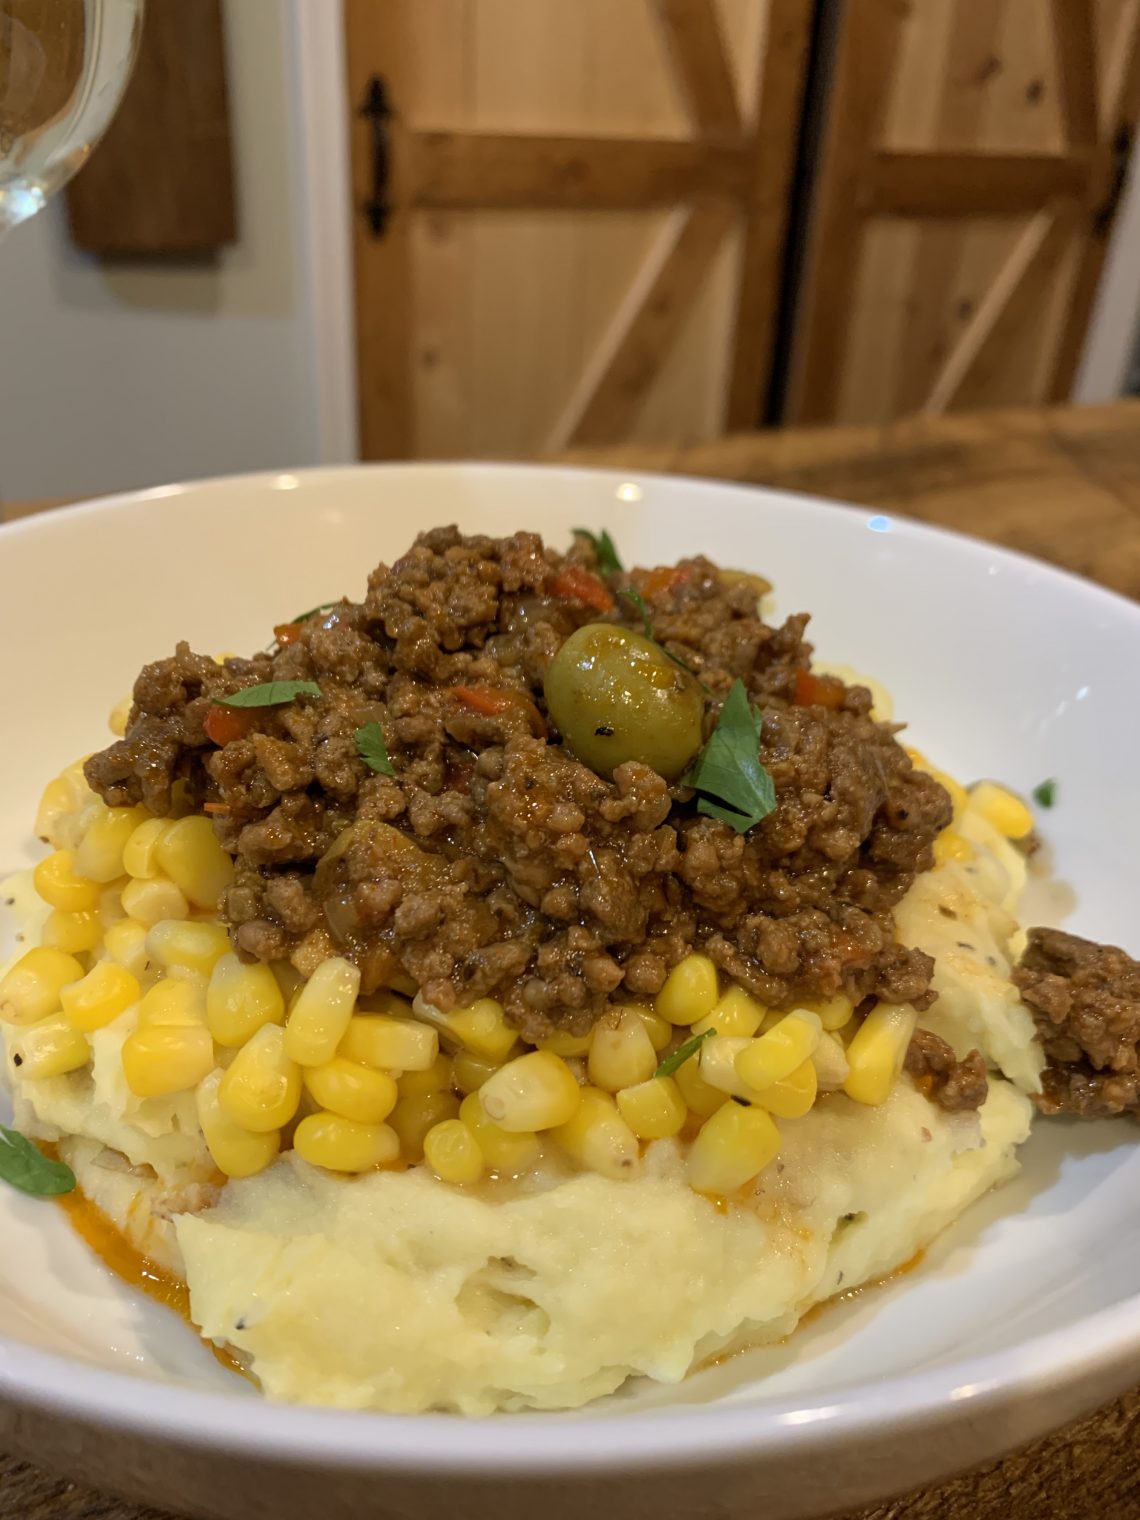
In my house we use Picadillo for filling empanadas and relleno de papa (potato balls), we top rice or garlic mashed potatoes with it. I’ve even made some seriously good grilled cheese sandwiches with it. OH YEAH, they were delicious!
When you have great basics, its just a jumping off point to amazing dishes that you can customize for your tastes and situations.
Now that you have your basic Picadillo recipe bump up the flavor by adding a few different ingredients like cinnamon and cumin, raisins and almonds… there’s warmth and sweetness and crunch then its the perfect filling for tamales. Or, change the beef to chicken or turkey and lighten up the dish. But I am getting ahead of myself. Today we keep it simple.
Enjoy!
Picadillo
basic puerto rican style picadilloEquipment
- Large saute pan
Ingredients
- 2 pounds ground beef
- 1/2 lg onion small dice
- 1/2 lg red bell pepper small dice
- 2 tbsp sofrito home made or store bought
- 2 packets sazon
- to taste salt and pepper
- 1/4 cup olives I use whole manzanilla olives, but sliced "salad olives" works well
- 8 oz tomato sauce I use 1 can of goya
- 1/4 cup water
- 2 tsp oregano
Instructions
- In a large saute pan over medium high heat brown your ground beef
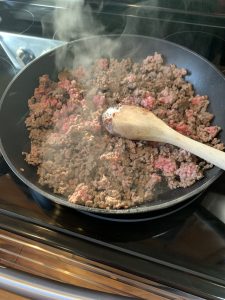
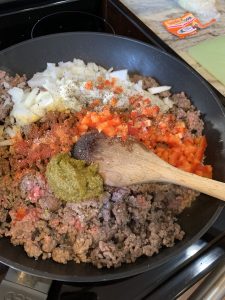
- Drain the rendered fat and add onions, peppers, sofrito, sazon, oregano, salt and pepper. Cook for about 5 minutes to soften peppers and onions
- Add tomato sauce, water and olives. Stir and cover. Simmer on low for about 20 minutes.
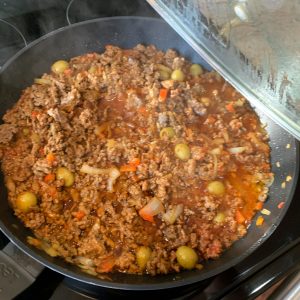
- Re-season if necessary and it is ready to eat. Use it to top garlic mashed potatoes with sweet corn.

- Or place on a cookie sheet to cool down to use later
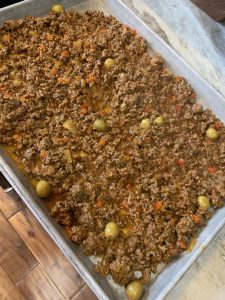
- I used it to fill baked empanadas

Empanada dough (baking)
Here is a quick empanad dough that I use for baking. Just grab your favorite filling.Servings 12 3 inchEquipment
- food processor
Ingredients
- 2 1/2 cup AP Flour
- 1 tsp salt
- 1 stick unsalted butter cold, cut into cubes
- 1 lg egg
- 1/4 cup ice water may need more, depending on flour used, humidity…I needed 1 extra tbsp today…
- 1 lg egg for brushing right before baking
Instructions
- in your food processor, add flour and salt and pulse to combine. Or you can mix in a large bowl.
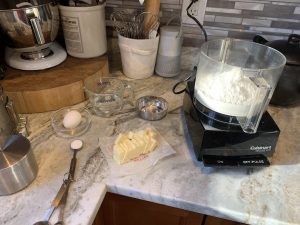
- Add cold butter and pulse until butter is about pea sized. Or you can use a pastry cutter or your hands to work in the butter.
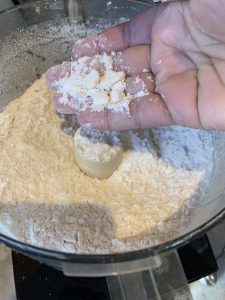
- add egg and 1/4 cup of ice water and pulse until it comes together when pressed. It till still look pretty corse and resemble wet sand. If it doesn't look like this after 1/4 cup of water, add 1 tbsp of water and pulse and try again.
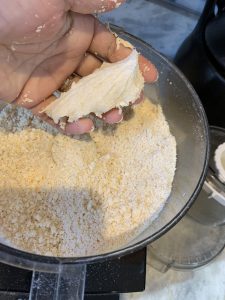
- pour out onto counter and form into a ball, wrap with plastic wrap and let it rest in the fridge for at least an hour before using.
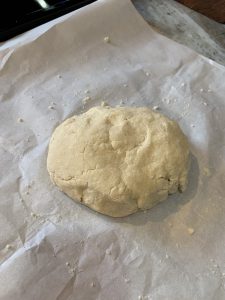
- Remove from fridge, roll out to about 1/8th of an inch
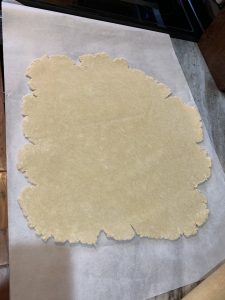
- Using a 3 inch round cookie cutter, or cup, or empanada mold cut out your rounds. Fill with your favorite filling

- Using a little bit of water around the inside edges press together and using your finger, a fork or your empanada press close them up tight. (As you can see I used a few different methods)

- Brush with eggwash and bake. 400 degrees for 15-18 minutes until golden brown.

Notes
You can fill these with any filling. Try our Picadillo recipe, or if you have left over shred it and mix it with some bbq sauce, chopped jalapeños and cheddar. Ham and cheese works too. Pepperoni, mozzarella and marinara…yum. You’re only limited by your imagination. -
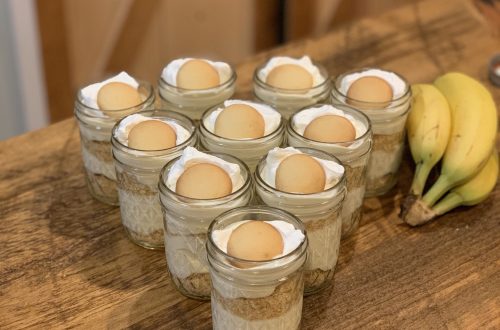
Banana Pudding
This past week my husband and I took a road trip to North Chicago to see our youngest son Jonathan graduate from bootcamp. It was a proud moment for us, and now we have 2 amazing sailors following in their dad’s footsteps…
I decided to come home and make his favorite dessert. I used to make this one for the cooler at the cafe and before I would even be able to get them into the cooler Jonathan would be right behind me pulling one out, because he knew that there wouldn’t be one left for him at the end of the day. Wow I miss those days! (sniff, sniff)
I know this is not your classic banana pudding recipe. This is one that I adapted to make it fit the way we eat. I have a problem with desserts that are too sweet and mask the flavors that you worked so hard to put into them. I want to be able to enjoy the taste of the banana and the vanilla of the custard. The hint of cinnamon in my cookie crumbs…and yes, I know cookie crumbs aren’t classic in banana pudding, but I find that texturally it works.
I hope you give this a try and hopefully it puts a smile on your face.
Enjoy!

Banana pudding
Home made and a little more grown up, banana pudding. I don't like my deserts to be sooo sweet that you cannot taste the love you put into it.Servings 12Equipment
- heavy bottom pot
- whisk
- sieve
- metal bowl
- ice bath
- stand or hand mixer is helpful
- food processor is helpful
Ingredients
vanilla custard
- 4 lg eggs
- 3/4 cup granulated sugar
- 3 tbsp corn starch
- 1/2 tsp salt
- 1 qt half and half
- 1 tbsp vanilla extract
- 2 tbsp unsalted butter
- 1 cup whipping cream
- 1/4 cup powdered sugar
- 1 tsp vanilla
cookie crumbles
- 1 box vanilla wafers keep a few aside for garnish
- 1/4 cup sugar
- 1/4 tsp ground cinnamon
- 1 pinch salt
- 6 tbsp unsalted butter melted
The banana part of it…
- 4 med bananas make sure they are ripe and super sweet
- 1 cup whipping cream
- 1/4 cup powdered sugar
- 1 tsp vanilla
Instructions
Vanilla custard
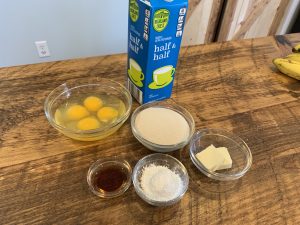
- Gather your ingredients, along with a heavy bottom pot, and a whisk
- Place eggs, sugar, corn starch and salt into your pot and whisk together.
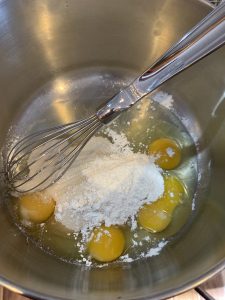
- Add your half and half and place on the stove over medium heat and whisk.
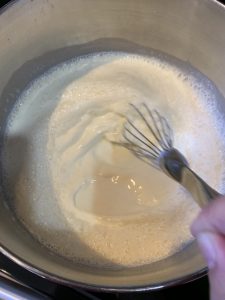
- You will keep whisking and stirring to make sure the custard heats evenly, you will begin to see a bunch of bubbles as it starts to heat through.
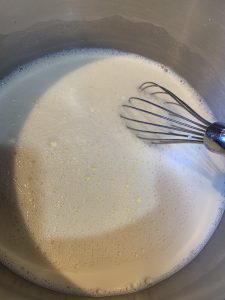
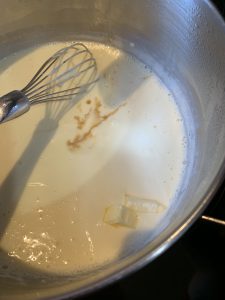
- It should take about 15 minutes, the custard will begin to thicken and I remove it as soon as I see the first boil bubble. Take off the heat and add your vanilla and butter and whisk.
- Pour through a sieve, to make sure there are not curdled bits of egg. Making sure not to push through. ( I tap the edges to get as much through with out worrying about getting any scrambled eggy pieces in my custard)
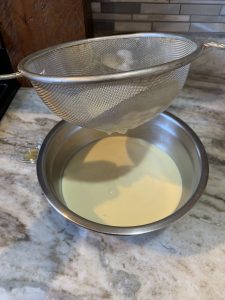
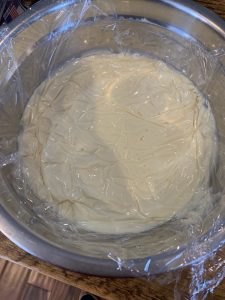
- Cool over an ice bath, preferably in a metal bowl stirring occasionally for about 20 minutes before covering with plastic wrap, placing the plastic wrap directly on the surface of the custard. Place in your fridge and completely cool for at least 4 hours.
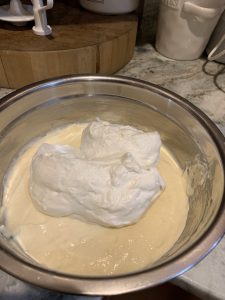
- After it cools and sets in the fridge, whip your cream. Add your whipping cream to your mixing bowl along with your powdered sugar and vanilla and whip until medium to stiff peaks. Fold into your custard.
Cookie crumbles
- Place your vanilla wafers (minus what you are using for garnish) into your food processor (or you can place into a ziplock bag and crush with your rolling pin) add your sugar, salt and cinnamon. Crush until crumbs.Add melted butter and mix until it looks like wet sand
The banana part of it
- Add your whipping cream to your mixing bowl along with your powdered sugar and vanilla and whip until medium to stiff peaks.
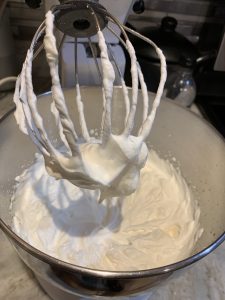
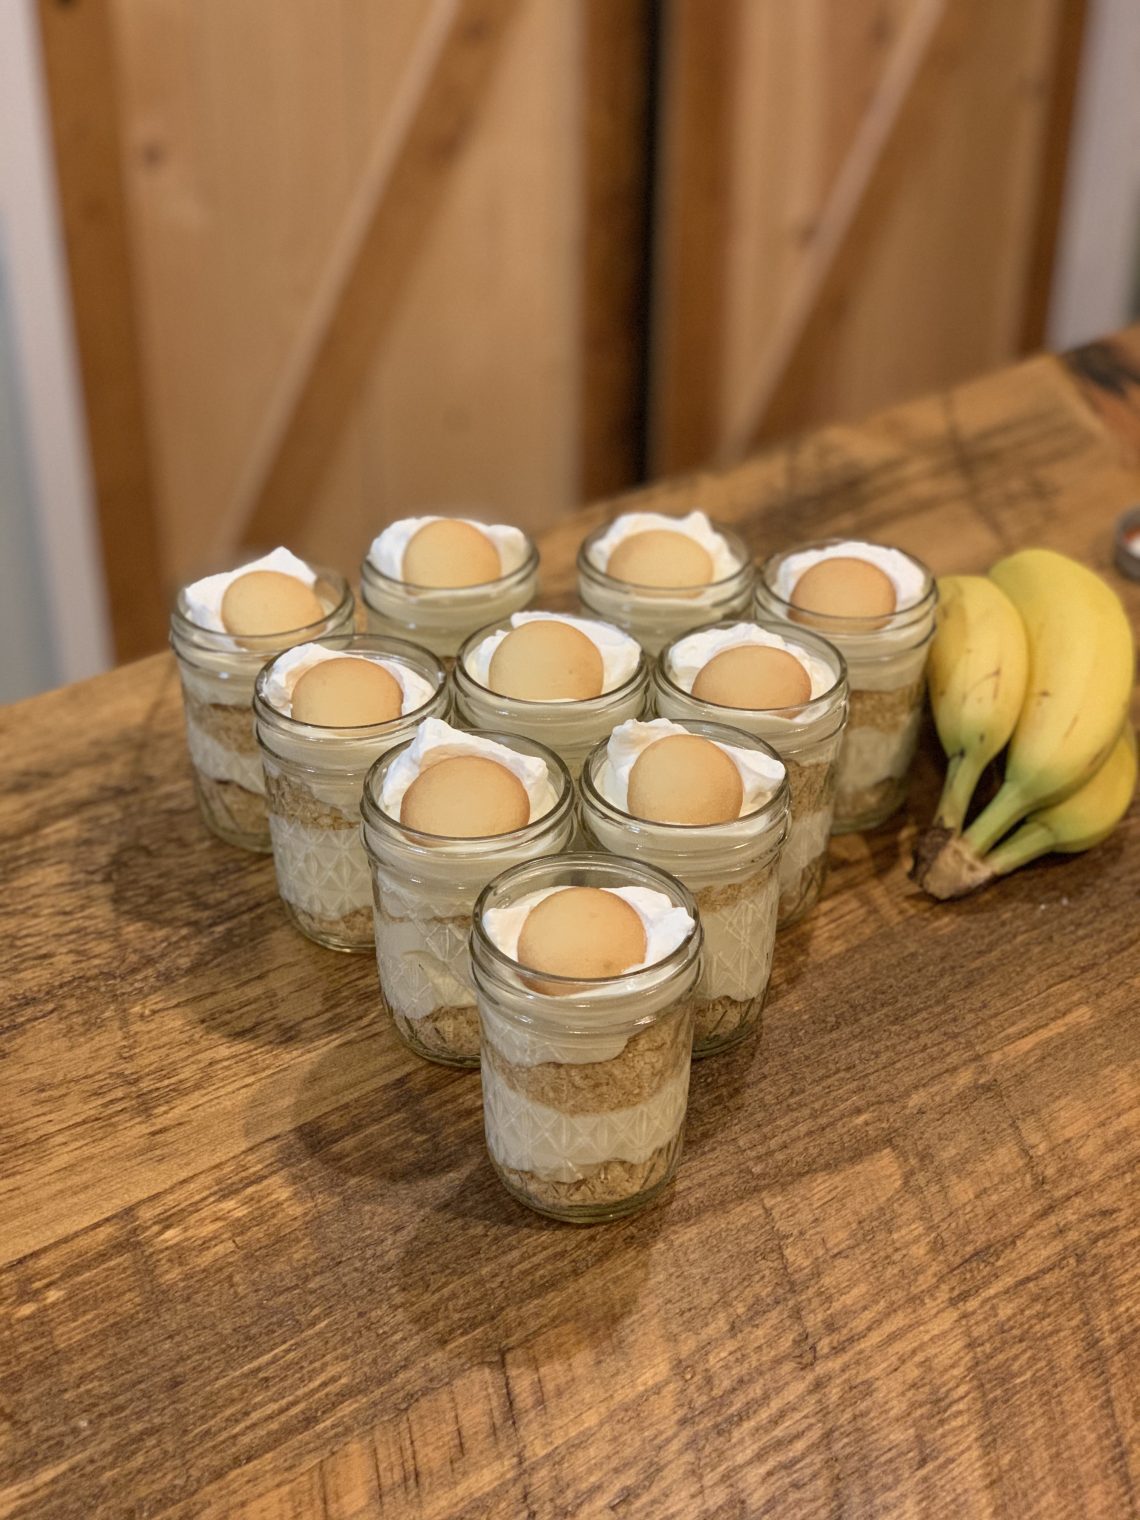
- slice up your bananas and start to build your banana pudding. Place a heaping tablespoon of crumbs onto the bottom of your chosen cup add a few slices of banana, add about a 1/4 cup of custard and repeat. Top with whipped cream and a vanilla wafer.

Notes
This is my go to vanilla custard. I use this recipe for the base of a bunch of other desserts. Cream puffs, napoleons, fruit tarts…. -
Bacon and sweet corn risotto with butter Old Bay shrimp
Smokey, sweet, creamy, tangy and little salty with a slight kick. It has all of the things that I need in my meal. The best part of it is how simple it is to make. But it looks fancy. So you can make it for a special dinner or if you are like me, make for a random Tuesday. Something needs to make Tuesdays special.
Now the hardest part of this recipe is to try to not eat all of the crisped bacon while you are waiting for you risotto to finish up. It was a struggle, but I behaved myself this time. Other than that, like I say with all of my recipes have fun with it. If you don’t like shrimp, no one says you cannot use another seafood. And if you don’t like seafood, who’s to tell you you cannot use chicken tenders cooked up in that butter and old bay?
I have to say the combination of smokey salty bacon with sweet pops of corn is the best. And while I am making it in the summer where you can find corn readily available, there is no shame in using frozen corn. I have a bag of super sweet corn kernels in my freezer at all times. I actually used it this time, I wasn’t happy with the condition of the corn I was finding.
Now grab yourself a glass of wine, put on some music, and make your dinner special. Enjoy!

Bacon and corn risotto with old bay butter shrimp
Servings 4Ingredients
Risotto
- 2 rashers thick cut smokey bacon cut into lardons (small strips)
- 1 tbsp olive oil
- 1/4 cup diced onion
- 3 cloves garlic minced
- 2 cups arborio rice
- 1 cup dry white wine
- 6 cups stock may need a little more (seafood, chicken, vegetable)
- 1 cup sweet corn kernals
- 3 tbsp heavy cream My little cheat to keep it creamy, traditionally you finish with butter
- 1/2 cup parmesan cheese shredded a little more to top
- 1 tbsp parsley chopped
- salt and pepper to taste
Butter old bay shrimp
- 4 tbsp unsalted butter
- 1 1/2 pounds U10-U12 shrimp Deveined I left the peel on, but peeled and tail on is fine too. About 4 per person
- 2 tbsp old bay
- 1/4 cup dry white win
- 1 tbsp parsley chopped
Instructions
Bacon and corn risotto
- Take 2 rashers of very thick bacon and slice into lardons and place into a cold pan and put over medium heat to render the fat and crisp the bacon.
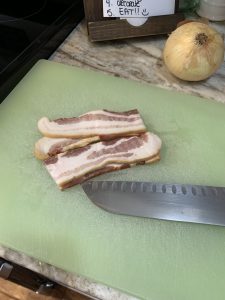
- Remove the bacon and drain off most of the fat leaving about 1 tbsp. Meanwhile place stock into a pot and heat to simmer.
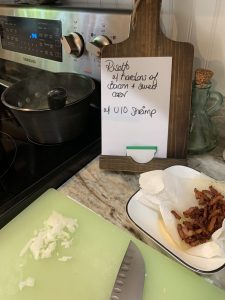
- Add 1 tbsp olive oil, onion, and garlic, salt and pepper. Cook 2-3 minutes to soften.
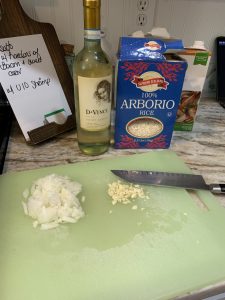
- Add arborio rice to the onion garlic and stir to coat the rice with the fat. Add 1 cup of white wine. I usually put the heat to medium low.
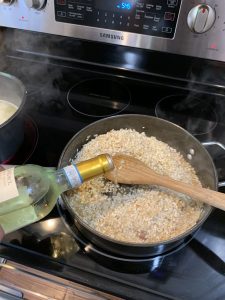
- Stirring let the wine absorb into the rice and then start adding stock. A couple ladles at a time, stirring frequently until it absorbs then add more.
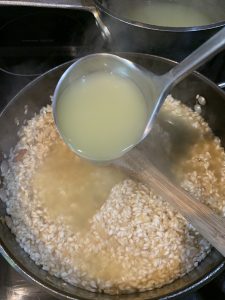
- This usually takes about 20 minutes until the rice is al dente.
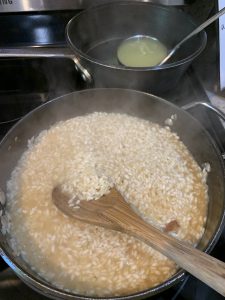
- With the last ladle of stock I add the corn.

- When the stock is almost absorbed, add the crisp bacon. Adjust salt and pepper.
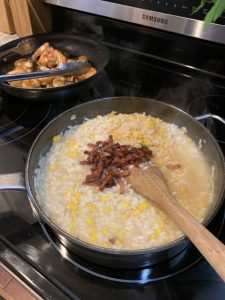
- Then finish with heavy cream, parmesan and parsley.
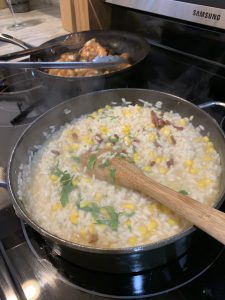
Butter old bay shrimp
- In a saute pan over medium to medium high heat melt butter and add shrimp.
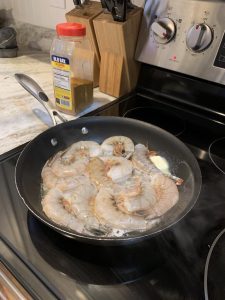
- Season with old bay, turning after about 3 minutes. Cook another 2-3 minutes and then add white wine. Finish with parsley
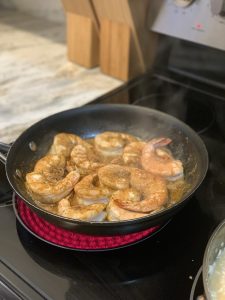
Notes
I chose to not peel my shrimp. I just find that it holds more of the butter, wine and old bay. But if you are making this as a special meal I would peel the shrimp but leave the tails on to make this easier to eat. -
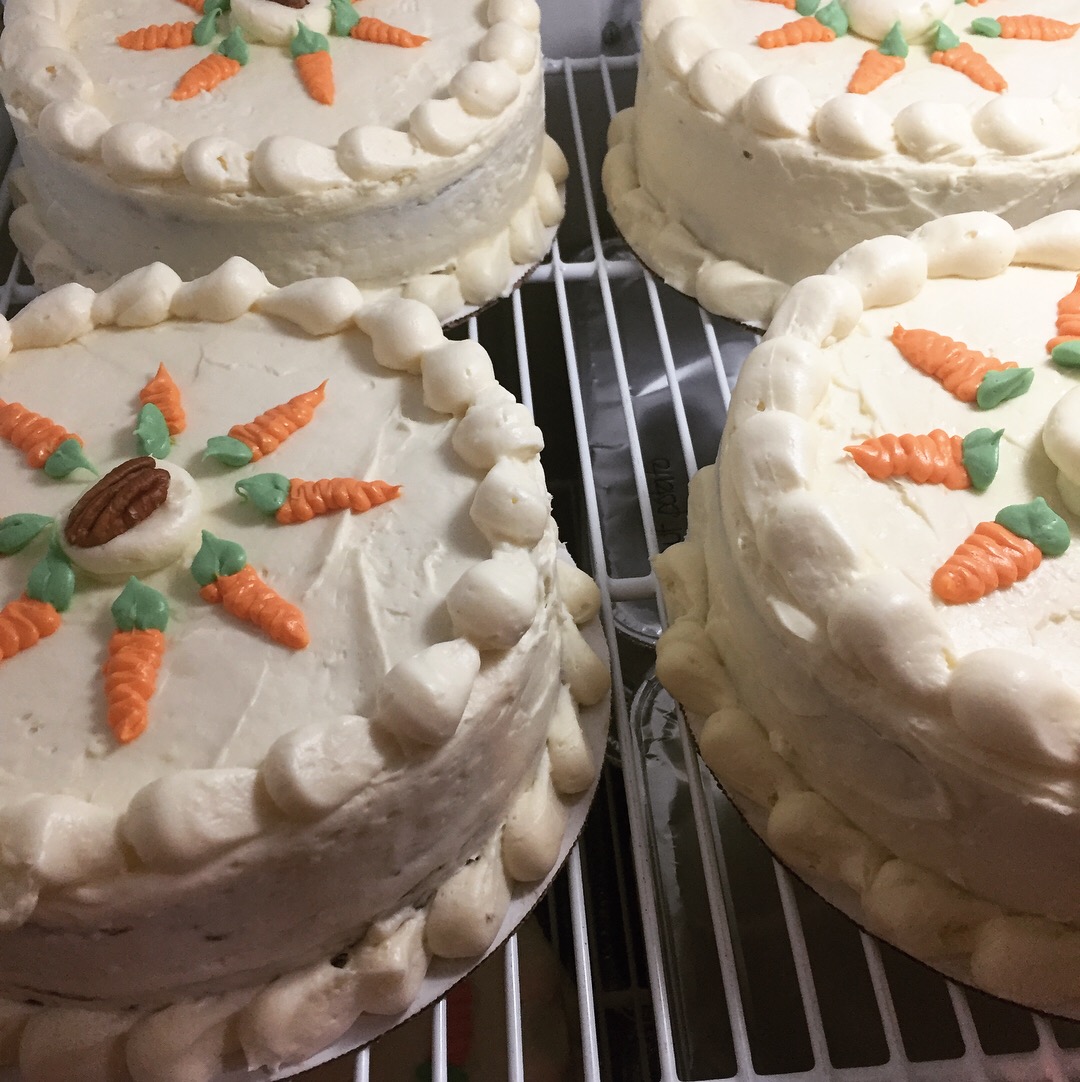
Carrot Cake for our quiet Easter.
This year Easter will be quiet. It will be myself and my husband at home. We will be missing the kids, grandkids and family. But we know that this is only temporary and we will be together again soon.
Until then, we are trying to keep a sense of normal. So we will have our Easter dinner, and our sweets. We will have family together…on FaceTime. We will make plans for the good times ahead and we will know that someday soon we will get those warm hugs from the ones we love the most.
Today I’m sharing with you a little bit of our normal. A warm hug from me to you. Please enjoy the carrot cake recipe.
Happy Easter!

Carrot Cake
warm spicy carrot cake with cream cheese frostingEquipment
- Stand mixer
- box grater
- off set spatula
Ingredients
- 2 cups AP flour
- 1 1/2 cups Canola oil
- 4 lg eggs
- 1 cup brown sugar
- 1 cup granulated sugar
- 2 tsp baking soda
- 1 tbsp cinnamon ground
- 1 tsp ginger ground
- 1/4 tsp cloves ground
- 1 tsp salt
- 1 tsp vanilla extract
- 3 medium carrots peeled and grated
- 1 1/2 cups walnuts chopped
Cream cheese Frosting
- 8 oz cream cheese softened
- 8 oz unsalted butter 2 sticks
- 3 1/4 cups powdered sugar
- 1 cup heavy cream
- 1 1/2 tsp vanilla extract
Decorating frosting
- 8 oz unsalted butter 1 stick
- 1 cup powdered sugar
- 1/2 tsp vanilla
- pinch of salt
- 1 tsp half and half
- food coloring
Instructions
- Preheat oven to 350 degrees. Prepare your pans. Spray and line with parchment.Gather your ingredients together
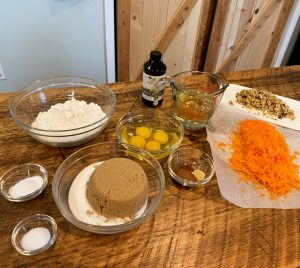
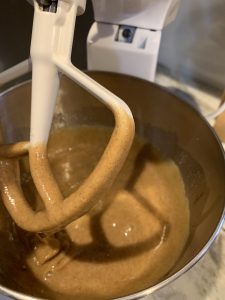
- In a large mixing bowl add, oil, eggs, sugar, salt, baking soda, cinnamon, ginger, cloves and vanilla. Mix for about 2 minutes until well combined.
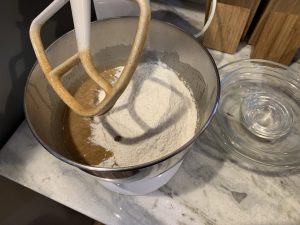
- Add flour and mix
- Add carrots and walnuts and mix in by hand.
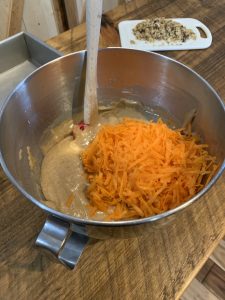
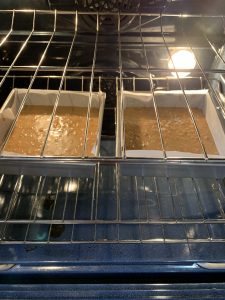
- Split batter between 2 pans and bake. 350 for about 40 minutes. Rotate pan after 20 minutes.
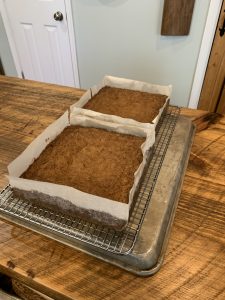
- Remove from oven, cool in pan for 5-10 minutes then transfer to rack to cool.Make frosting.
Cream cheese frosting
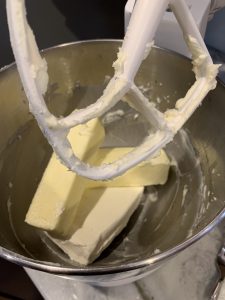
- Add cream cheese and butter in mixing bowl with paddle attachment and mix on medium for about 2 minutes, scraping down half way.
- Add 3 cups of powdered sugar, 1 tsp vanilla and mix for another 2 minutes until light and fluffy. Remove from bowl and set aside.In the same bowl add heavy cream, 1/4 cup powdered sugar and 1/2 tsp vanilla and with the whip attachement whip until stiff peaks.Fold whipped cream into frosting.
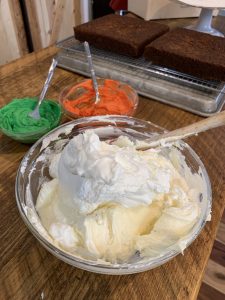
Decorator frosting
- place stick of butter into mixing bowl with paddle attachment and whip until light and fluffy, about 2-3 minutes scraping down half way through.
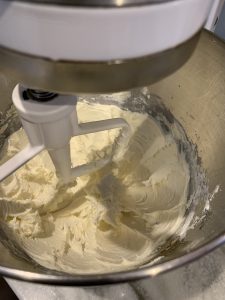
- add cup of powdered sugar, pinch of salt and vanilla and whip until well combined and fluffy. Seperate into seperate bowls to add colors.
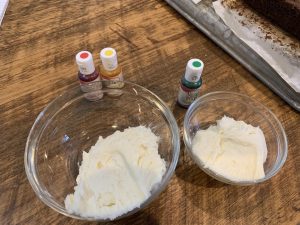
- Add desired colors and mix well, set aside.
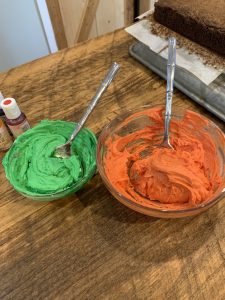
- Place one of the cakes on a cake board, or plate. Use a little frosting as glue so the cake will not move. Frost and stack.
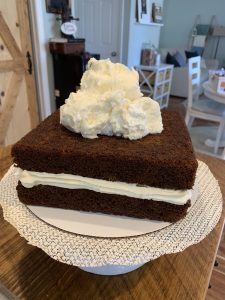
- Once coated place in freezer or fridge to set up.
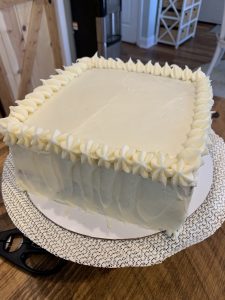
- Using colored icing, I piped out "carrots" onto wax paper and froze them for 15 minutes.

- Once they are frozen, you can pop them off and use to decorate your cake

- Have fun with it!

Notes

